Introduction
Though it’s very controversial statement, I believe, we all should have a place in the ocean of the Internet. After some contemplation period I came to a conclusion that I need:
- Personalized domain name
- Personalized email address
- Blog to share ideas
As of points 1 and 2, I registered the domain with GoDaddy and bought E-Mail service for 5$ a month. Also, I’ve created and registered a new user in the email.
The issue was to connect the email server on my MacOS. However, it was an easy process by selecting System Preferences->Internet Accounts->Microsoft Echange. Login with your new user credentials
So the only one problem with my idea was personalized blog. I had several requirements for the blog:
- Fully customizable
- Easy for editing
- Easy to add code snippets
- Source safe
As you can understand regular blogs by Google or by life journal didn’t work for me. Since I’m software developer I’m used to Markup language that is used in Confluence, Wiki and some other tools like Obsidian. As a result, I came to a conclusion that Markup blog with its content in source control like github is the best approach.
Apparently GitHub already provides a service of hosting static pages - GitHub Pages.
The following post is dedicated to instructions of setting up the blog. This post is actually a first post of the blog.
Creating Blog
These instructions were created for MacOs
Install Software
Install Homebrew
1
/bin/bash -c "$(curl -fsSL https://raw.githubusercontent.com/Homebrew/install/HEAD/install.sh)"
Install chruby and the latest Ruby with ruby-install
Install chruby and ruby-install with Homebrew:
1
brew install chruby ruby-install xz
Install the latest stable version of Ruby (supported by Jekyll):
1
ruby-install ruby 3.1.3
This operation took some time… So be patient
1
2
3
echo "source $(brew --prefix)/opt/chruby/share/chruby/chruby.sh" >> ~/.zshrc
echo "source $(brew --prefix)/opt/chruby/share/chruby/auto.sh" >> ~/.zshrc
echo "chruby ruby-3.1.3" >> ~/.zshrc # run 'chruby' to see actual version
Install Jekyll
1
gem install jekyll bundler
Configure Github
Create new repository
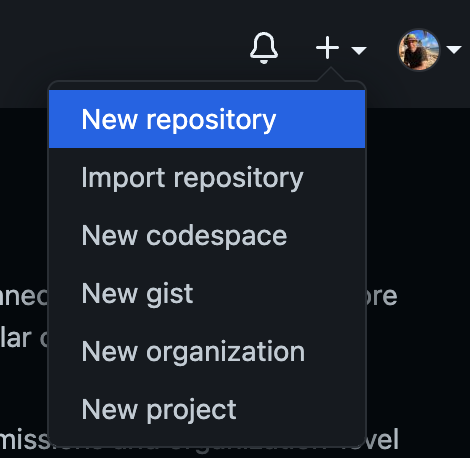
Give a name to the repository like <github-user-name>.github.io
Create 2 branches
- main
- gh-pages
Build Blog with Jekyll
Clone repository
1
2
git clone https://github.com/<user-name>/<user-name>.github.io.git
cd <user-name>.github.io
Jekyll setup
1
jekyll new --skip-bundle .
It will create default version of the blog. I did several changes and my project looks like: 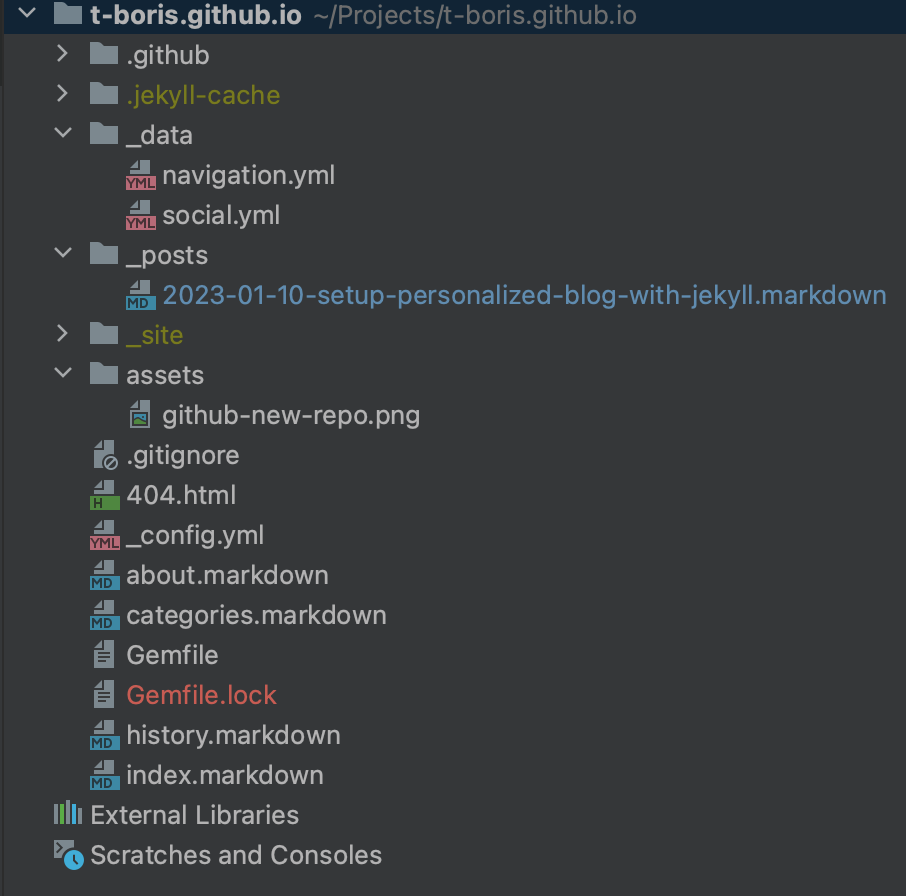
Theme selection
I didn’t like the minima theme provided out of the box, so I was looking for a prettier design. I decided to use theme jekyll-theme-tao. To do that:
Change _config.yml
1
2
3
4
5
# Build settings
theme: jekyll-theme-tao
# _plugins:
#  - jekyll-remote-theme
#  - jekyll-feed
Change Gemfile
1
2
3
...
gem "jekyll-theme-tao"
...
GitHub Action
GitHub provides an “actions” functionality, that allows to execute a build/task in a docker container. We are going to write a workflow that builds the site, merges the changes to gh-pages branch, and deploy the site to GitHub pages.
But before that ensure that in your repository -> Settings gh-pages branch is selected: 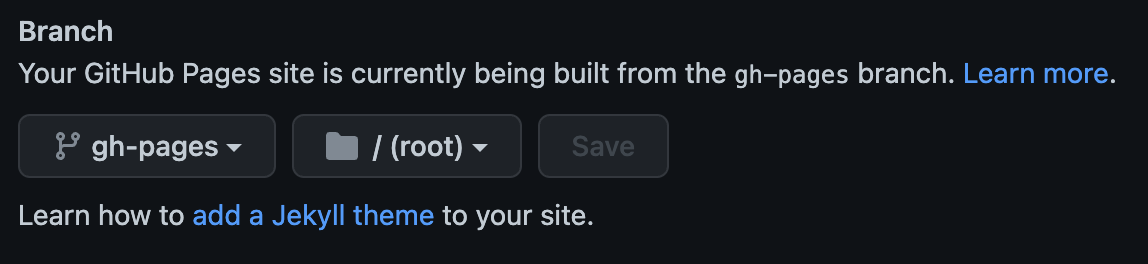
Create file ./github/workflows/github-pages.yml with content:
1
2
3
4
5
6
7
8
9
10
11
12
13
14
15
16
17
18
19
20
21
22
23
24
25
26
27
28
29
30
31
name: Build and deploy Jekyll site to GitHub Pages

on:
  push:
    branches:
      - main

jobs:
  github-pages:
    runs-on: ubuntu-latest
    steps:
      - uses: actions/checkout@v3
      - uses: actions/cache@v3
        with:
          path: vendor/bundle
          key: $-gems-$
          restore-keys: |
            $-gems-
      - uses: jeffreytse/jekyll-deploy-action@v0.4.0
        with:
          provider: 'github'
          token: $ # It's your Personal Access Token(PAT)
          repository: ''             # Default is current repository
          branch: 'gh-pages'         # Default is gh-pages for github provider
          jekyll_src: './'           # Default is root directory
          jekyll_cfg: '_config.yml'  # Default is _config.yml
          jekyll_baseurl: ''         # Default is according to _config.yml
          bundler_ver: '>=0'         # Default is latest bundler version
          cname: ''                  # Default is to not use a cname
          actor: ''                  # Default is the GITHUB_ACTOR
          pre_build_commands: ''
Commit directory to the main branch
The workflow will detect the changes, pick it up, merge changes to the gh-pages branch and will deploy the site.
Now the blog is available by URL: https://<user-name>.github.io
Configure blog with custom DNS
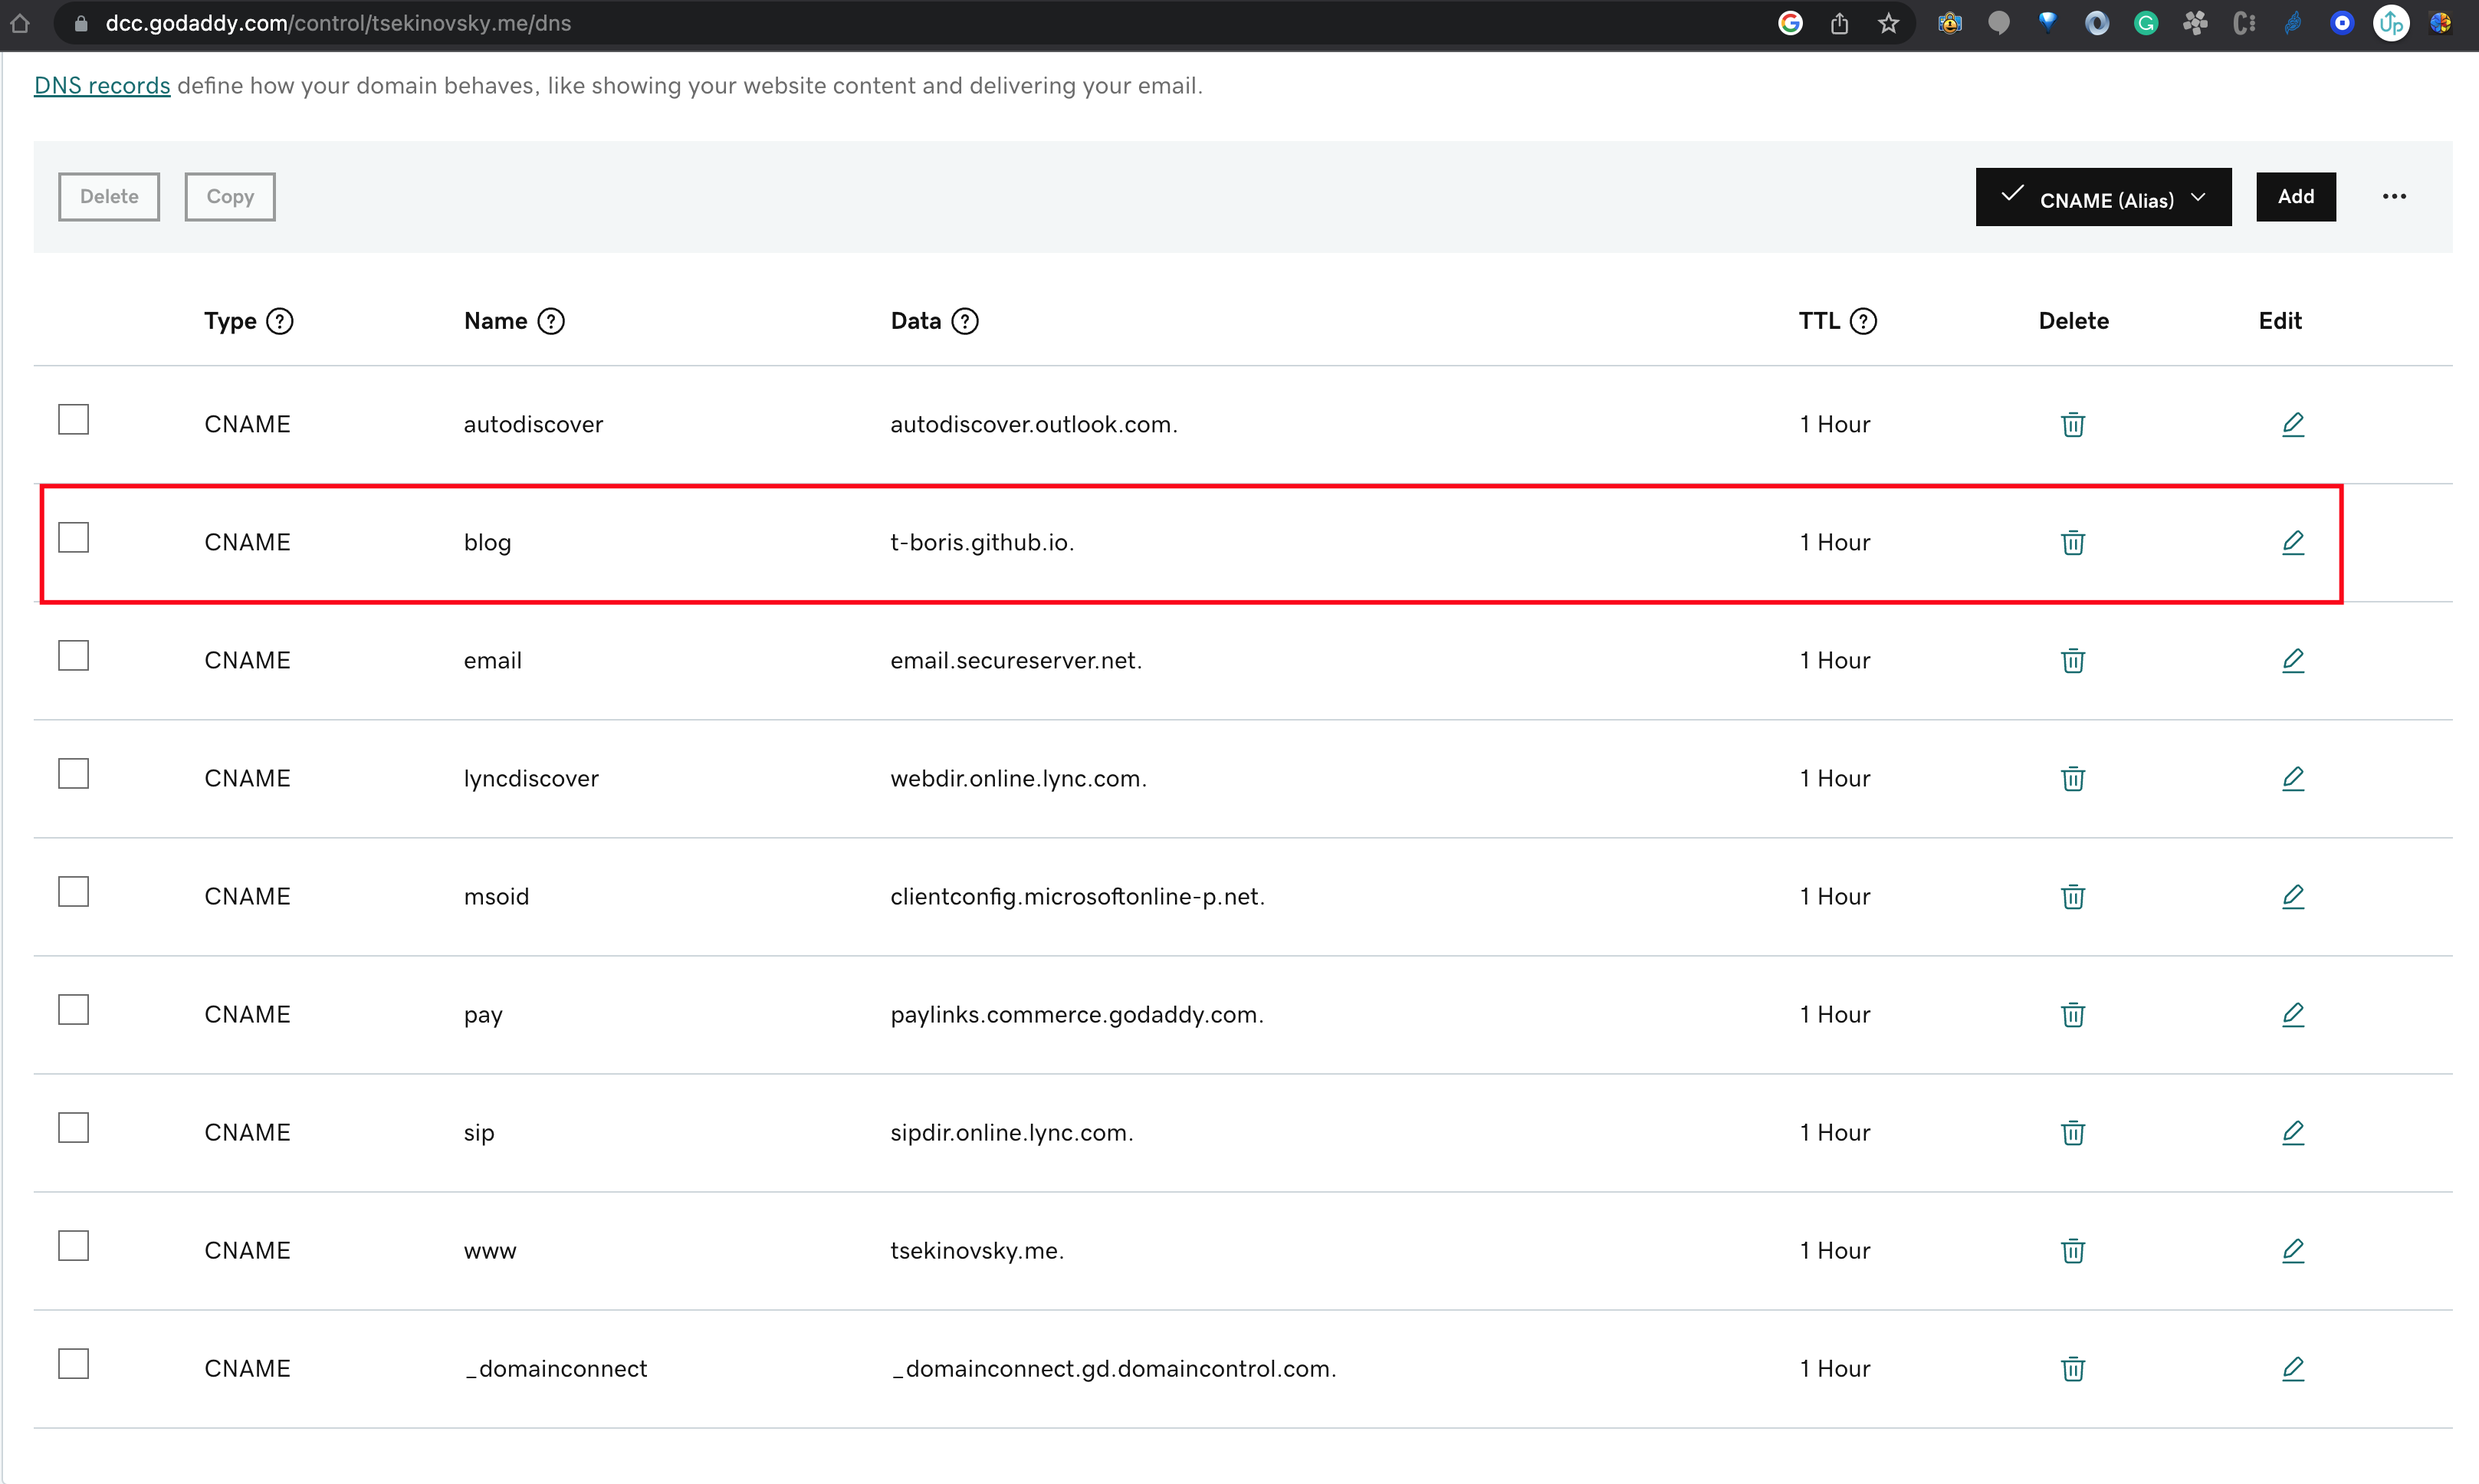
Create CNAME in GoDaddy
- Type: CNAME
- Name: blog
- Data: t-boris.github.io.
Configure custom domain in GitHub
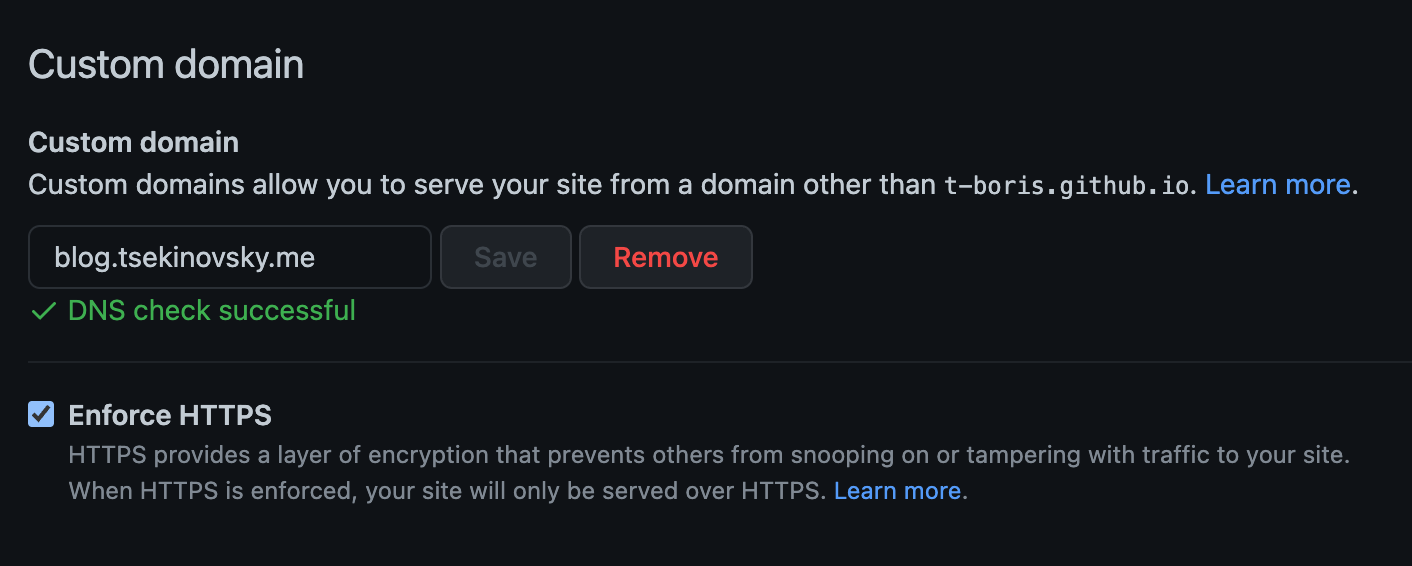
Now each time I’ll add Markup file to _posts directory the site will be updated, and it’s available by custom DNS.
Full code of the blog is available by URL https://github.com/t-boris/t-boris.github.io
Comments powered by Disqus.